There’s a quiet revolution rising from kitchens everywhere-a bake-at-home renaissance that’s turning ordinary loaves into rustic masterpieces.At the heart of this transformation lies a deceptively simple secret: the no-knead method. Couple it with the enchanting heat-retaining powers of a Dutch oven, and suddenly, you’re stepping into the world of artisan bread baking without the fuss or fancy equipment. In this article, we’ll unveil the magic behind mastering no-knead artisan bread, revealing how patience, a few humble ingredients, and a cast-iron pot can create crusty, golden loaves that rival your favorite bakery’s finest. Prepare to discover a flavorful new rhythm to bread making-one where time, not toil, crafts perfection.
The Science Behind No-Knead Dough and Its Flavor Growth
Mastering no-knead artisan bread explores a revolutionary approach to breadmaking that emphasizes patience over effort, unlocking incredible flavor with minimal hands-on time. This method relies on a long,slow fermentation process which allows natural enzymes and wild yeast to develop complex flavor profiles and an open,airy crumb without conventional kneading.
When you let your dough rest for 12 to 18 hours, gluten strands form gently in the background, creating structure while organic acids and alcohol compounds evolve. This gradual fermentation deepens the taste,resulting in a loaf with that signature mildly tangy,rich aroma and a delightfully chewy texture.
Choosing the Perfect Dutch Oven for Artisan Bread baking
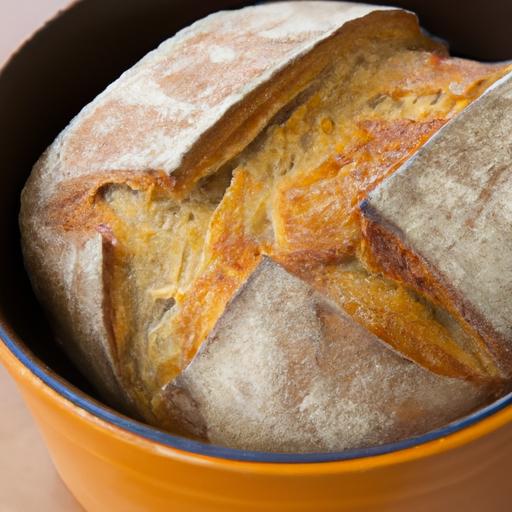
to truly elevate your no-knead bread, the choice of dutch oven is crucial. A heavy, cast-iron Dutch oven with an enamel coating is ideal as it retains and evenly distributes heat, simulating professional steam ovens, essential for forming that irresistibly crisp crust. Look for one with a snug-fitting lid to trap steam released by the dough during baking,which keeps the exterior moist until it crisps perfectly in the final moments.
Preferably, a 5 to 7-quart size fits most home bread dough portions, providing ample space for rise without risk of over-expansion or sticking. Brands like Le Creuset and Lodge offer reliable options with excellent heat retention.
Step-by-Step Guide to Achieving the Ideal Crust and Crumb
- Mix Ingredients Gently: Combine your flour, water, salt, and yeast using a sturdy wooden spoon or spatula just until incorporated to avoid overdeveloping gluten initially.
- Long Fermentation: Cover your dough and let it ferment at room temperature for 14-18 hours – the bloom of flavor happens here.
- Preheat the Dutch Oven: Place your empty Dutch oven and lid in the oven and preheat to 450°F (230°C) for at least 30 minutes to ensure it’s piping hot.
- Shape without Kneading: Lightly flour your hands and surface, then use a gentle folding technique to shape the dough into a round boule.
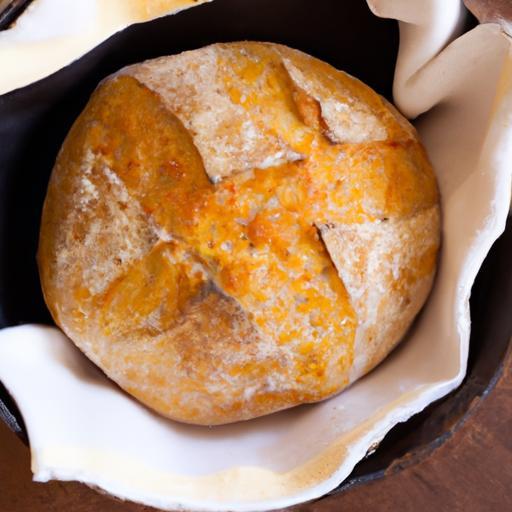
- Transfer to the Dutch Oven: Place the dough seam side down on parchment for easy lifting. Carefully remove the hot Dutch oven from the oven and gently transfer the dough inside.
- Bake Covered: Bake with the lid on for 30 minutes to trap steam, encouraging the crust to puff and expand.
- Finish Uncovered: Remove the lid and bake for an additional 10-15 minutes to develop a dark golden crust with that gorgeous crackle.
- Cool Entirely: Transfer the bread to a wire rack to cool for at least one hour; this completes the crumb setting process and enhances texture.
Expert Tips for Enhancing Aroma and texture in Your Loaf
- Use High-Quality Flour: A mixture of bread flour and unbleached all-purpose flour can boost both gluten development and flavor complexity.
- Control Hydration: Higher hydration (around 75-80%) encourages an open crumb but requires gentle handling and a well-seasoned Dutch oven.
- experiment with Fermentation Time: Longer fermentations enhance sour notes and aroma; refrigerate dough overnight for even deeper flavor.
- Add Seeds or Herbs: incorporate toasted sesame seeds or rosemary into the dough or sprinkle on top before baking to boost aroma.
- Steam Supplement: if your Dutch oven lid fits loosely, try placing a small oven-safe pan with water beneath the bread to add moisture.
- Use a Bread Lame or Sharp Knife: Score your dough just before baking to control expansion and add an artistic touch.
Prep and Cook Time
- Preparation time: 20 minutes
- Fermentation Time: 14-18 hours
- Baking Time: 40-45 minutes
Yield
One 1.5-pound loaf,serves 6-8 slices.
Difficulty Level
Easy to Medium – Perfect for bakers of all levels eager to dive into artisan bread without complex techniques.
Ingredients
- 3 cups all-purpose flour, preferably unbleached, sifted
- 1¼ teaspoons fine sea salt
- ½ teaspoon active dry yeast
- 1¼ cups lukewarm water (around 75°F/24°C)
Instructions
- In a large mixing bowl, whisk together the flour, salt, and yeast.
- Pour in the lukewarm water and gently mix with a wooden spoon or spatula until all ingredients are just combined into a sticky, shaggy dough.
- Cover the bowl tightly with plastic wrap or a clean kitchen towel. Let the dough rise at room temperature (68-72°F/20-22°C) for 14 to 18 hours. You’ll know it’s ready when the surface is bubbly and doubled in size.
- Turn your dough out onto a floured work surface. With lightly floured hands, gently fold the dough over itself 2-3 times to form a round ball. Cover loosely and rest for 20 minutes.
- Meanwhile, place your empty Dutch oven and lid in your oven and preheat to 450°F (230°C) for at least 30 minutes.
- using parchment paper, lift and transfer your dough into the preheated Dutch oven. cover with the lid and bake for 30 minutes.
- Carefully remove the lid and bake for another 10 to 15 minutes, until the loaf is deep golden brown and crusty.
- Remove the bread from the dutch oven and place on a wire rack to cool completely before slicing.
Chef’s Notes
- For a nuttier flavor and crunch, try mixing in up to ¼ cup of toasted sunflower or pumpkin seeds.
- Whole wheat flour can be substituted for half the all-purpose flour for a heartier loaf but note it may alter hydration needs.
- If your dough is slow to rise due to cooler kitchen temperatures, give it a warm spot, such as inside an off oven with the light on.
- Store leftover bread in a paper bag or bread box to maintain crust crispness; refrigerate onyl if moisture is excessive.
Serving Suggestions
Serve slices of this artisan bread with a drizzle of high-quality extra virgin olive oil and a sprinkle of flaky sea salt. It’s sublime alongside creamy avocado, fresh ricotta, or your favorite nut butter. Garnish with fresh thyme or rosemary for an inviting aroma that awakens the senses.
This loaf pairs wonderfully with soups, vibrant salads, or a simple spread of garden-fresh tomato bruschetta.
| Nutrient | Per Serving (1 slice) |
|---|---|
| Calories | 150 kcal |
| Protein | 5 g |
| Carbohydrates | 30 g |
| Fat | 1 g |
Explore more artisan bread techniques to expand your baking repertoire.For scientific insights on fermentation and gluten formation, check out ScienceDaily’s fermentation study.

Q&A
Q&A: Mastering No-Knead Artisan Bread: dutch Oven Magic Unveiled
Q1: What makes no-knead bread so special compared to traditional bread recipes?
A1: No-knead bread is a captivating blend of simplicity and science.It skips the labor-intensive kneading process by relying on a long fermentation, allowing gluten to develop naturally. This slow magic results in a crusty, airy crumb that tastes like it took hours of effort, though your hands barely break a sweat!
Q2: why use a Dutch oven for baking no-knead artisan bread?
A2: The Dutch oven is the unsung hero of rustic bread baking. Its heavy lid traps steam during the initial bake, creating a humid surroundings that helps develop that coveted crackly crust. It’s like giving your loaf a mini steam bath-essential for artisan-quality crust and beautiful oven spring.
Q3: Can I use any type of flour for this no-knead recipe?
A3: While all-purpose flour works well and is accessible, combining bread flour or even a touch of whole wheat flour elevates the texture and flavor. Bread flour’s higher protein content boosts gluten development,while whole wheat adds a subtle nuttiness and complexity.
Q4: How long can I let the dough ferment, and does it affect the flavor?
A4: Fermentation is your flavor atelier! The standard no-knead recipe ferments for 12 to 18 hours, but extending that up to 24 hours deepens the flavor, yielding tangier notes and a richer crumb.Just remember, longer fermentation means more pronounced sour aromas-exactly what artisan bread fans crave.
Q5: What’s the secret to handling the sticky dough without kneading?
A5: Embrace the sticky, shaggy nature of no-knead dough-it signals hydration and lightness! For handling, use well-floured hands and surfaces, and gently fold the dough rather than kneading.This gentle coaxing preserves gas bubbles and structure, crucial for an airy loaf.
Q6: How do I know when my no-knead bread is perfectly baked?
A6: Look for a golden-brown crust with blistered bubbles and a deep, caramelized color.Tap the bottom-if it sounds hollow, your crust is crisp and the inside fully baked. A digital thermometer aimed for about 205°F (96°C) internal temperature ensures your artisan creation is done to perfection.
Q7: Can I customize the flavor without compromising the no-knead technique?
A7: Absolutely! Add-ins like toasted seeds, dried herbs, or olives gently folded into the dough before the final rise offer splendid flavor boosts. Just avoid heavy or liquid ingredients that might alter hydration balance, keeping that perfect no-knead texture intact.
Q8: What are some common pitfalls beginners face with no-knead Dutch oven bread, and how can I avoid them?
A8: The biggest challenges include underproofing (resulting in dense crumb) and insufficient steam (leading to a dull crust).To dodge these, trust your fermentation time-don’t rush-and ensure your dutch oven is preheated thoroughly. Remember: patience and heat retention are your best friends.
Q9: Is it possible to bake no-knead bread without a Dutch oven?
A9: You can, but the Dutch oven’s steam-trapping magic is hard to replicate. Alternatives include baking on a baking stone with a pan of water underneath or tenting your loaf with foil. However, the Dutch oven remains the crown jewel for that authentic artisan crust and crumb.
Q10: How should I store my no-knead artisan bread to enjoy it best?
A10: For crusty bread,a paper bag or bread box at room temperature is ideal for a day or two. To preserve freshness longer, freeze the loaf wrapped tightly in foil or plastic. When ready,refresh the crust by reheating briefly in a hot oven-a perfect revival of your homemade masterpiece.
Unlock the magic of no-knead artisan bread-your Dutch oven is waiting to reveal its secrets!
Wrapping Up
As the final crumb melts away and the warm aroma lingers in your kitchen,mastering no-knead artisan bread with the magic of a Dutch oven transforms baking from a chore into a cherished ritual. With patience,simple ingredients,and a touch of cast-iron wizardry,you’ve unlocked the door to crusty perfection and tender,flavorful crumb-no fancy tools or hours of kneading required. Whether you’re a novice baker or a seasoned flour whisperer, this timeless method invites you to slow down, savor the process, and savor even more the delicious rewards waiting at the loaf’s end. So dust off your Dutch oven, embrace the quiet alchemy of slow fermentation, and let every bake be a testament to the art of effortless, artisanal breadmaking.